Your Own AI Character in Midjurney– Starting from Scratch! 🚀
Hey! As you know, there are plenty of AI solutions out there for generating images—you can play around with ChatGPT, Gemini, or Grok. And that’s cool, but for me, the ultimate solution (seriously!) is Midjourney. Why?
Because it’s the only one that lets me create a character that looks the same in every single image. This is how I can keep the stories of my characters, like Bunko Tales or Meeple Girl, consistent on the blog. In other tools, every new "girl" is a different person. In Midjourney, you are the director, and you decide who your permanent actor is.
I want to help you get into this because it’s an absolute blast. Today, I’ll show you how to create your base character—the foundation we’ll build everything else on.
Step 1: Where do I click?
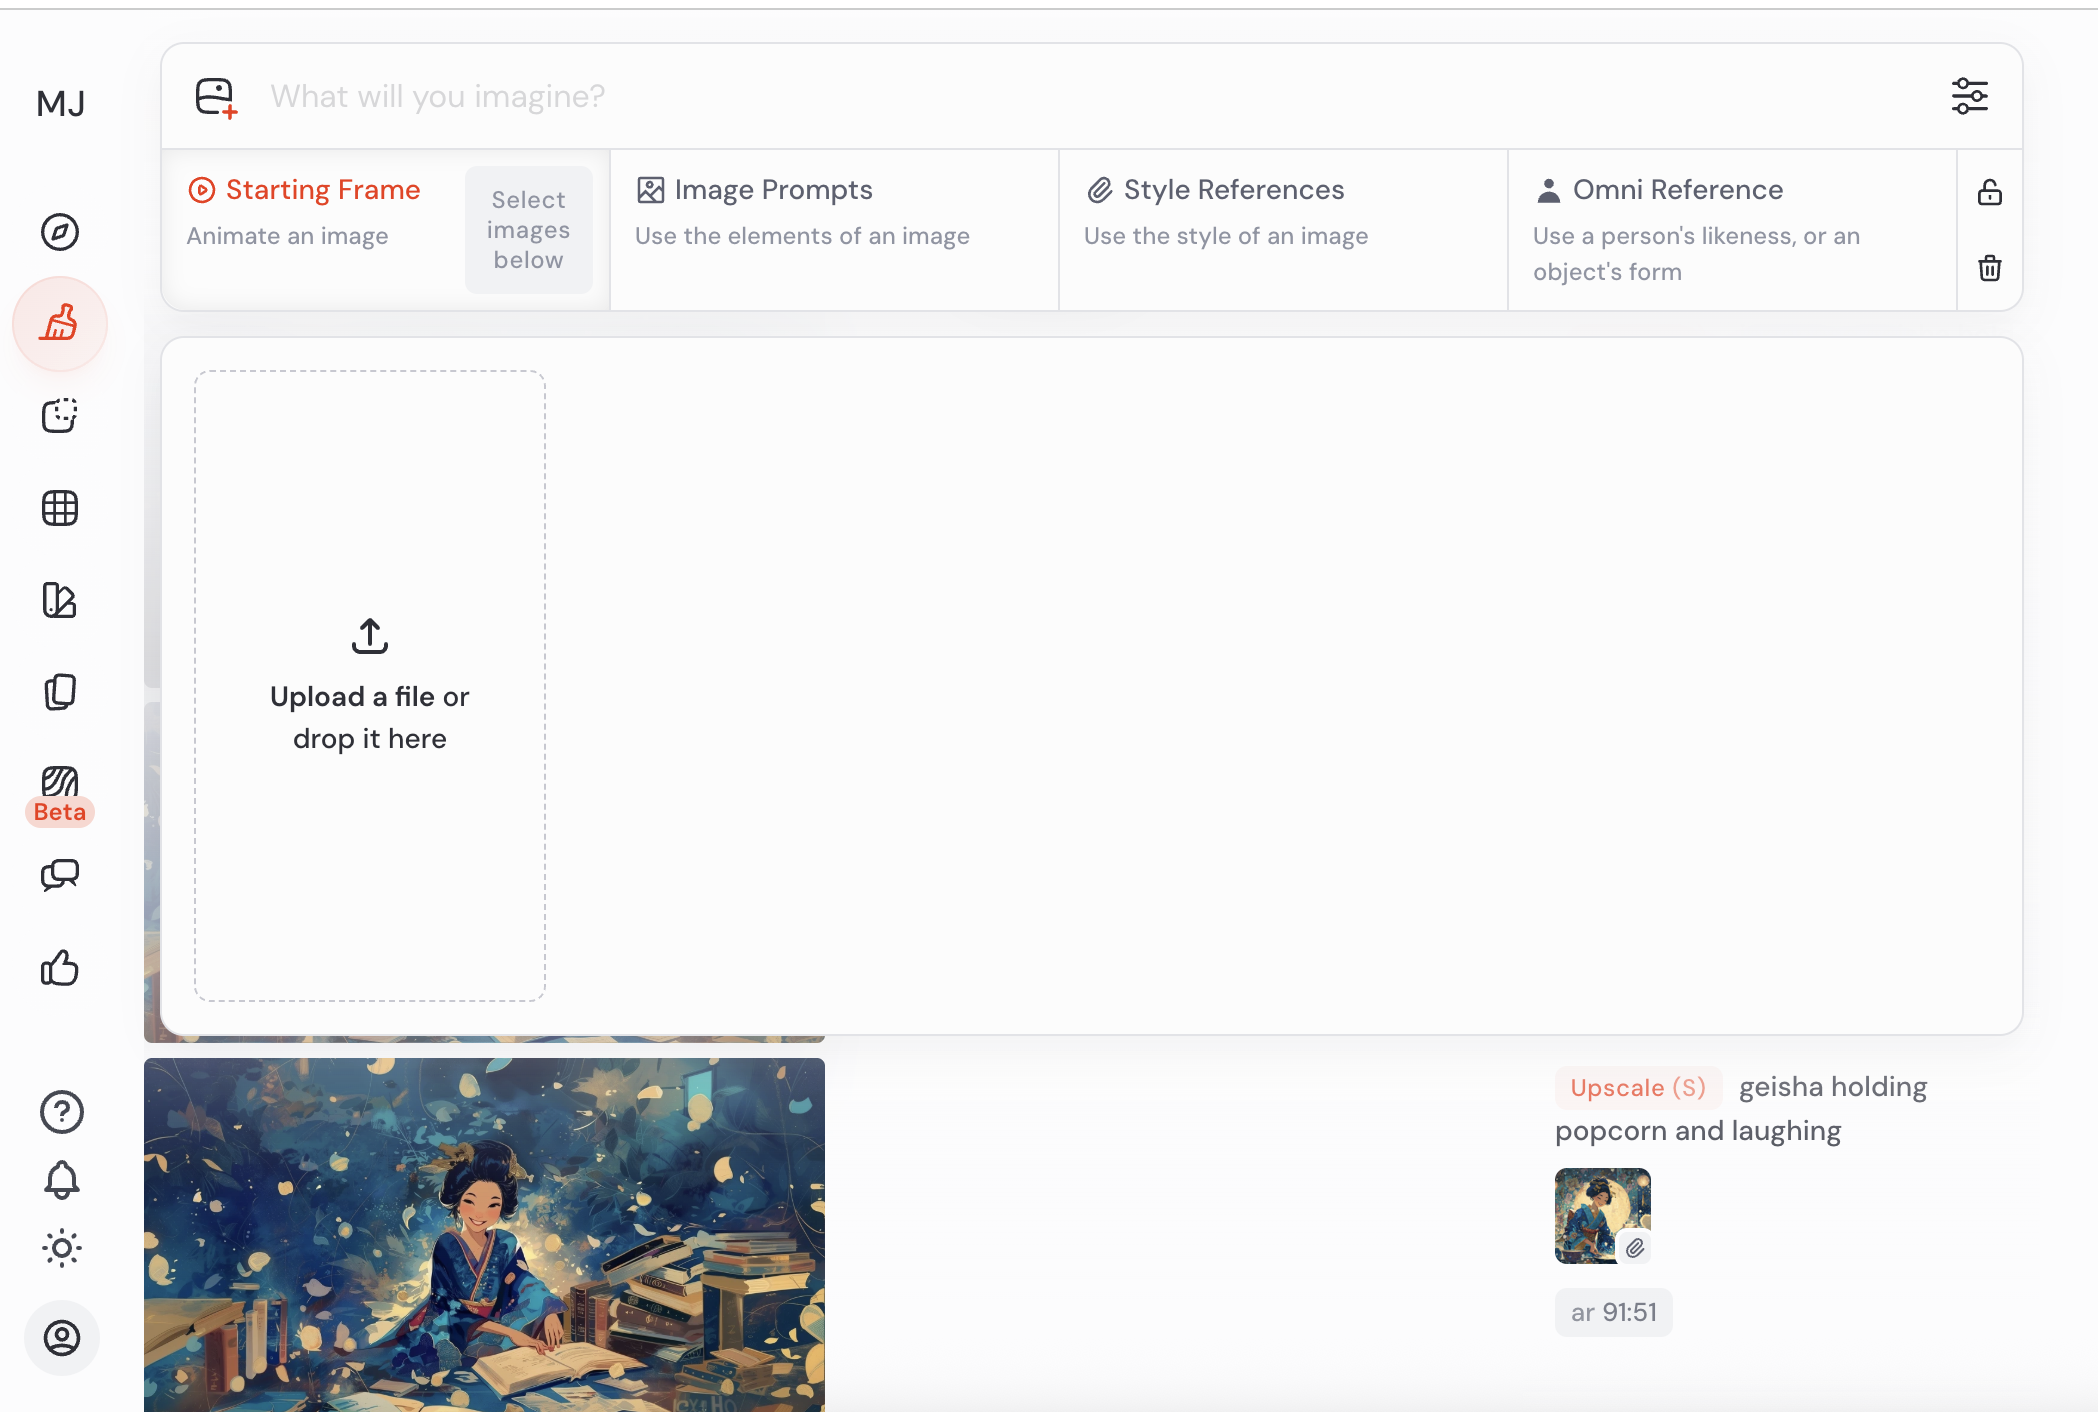
Take a look at the panel (the one in the screenshot below). At the very top, you’ll see a bar that says "What will you imagine?". This is your place for "spells," also known as Prompts.
What is a Prompt? It’s simply a description of the image you want the AI to paint. Midjourney can’t read your mind, so we have to tell it what we want to see. We write in English—if you're not confident, just use Google Translate; MJ understands it perfectly!
Step 2: Designing your character’s "DNA"
Before we send our hero on adventures, we need to decide what they look like. The most important things are the characteristic features—something you’ll always recognize them by (their "DNA").
Look at my geisha. Her permanent features are:
Hair: A high, black updo with traditional decorations.
Face: A huge, joyful smile and squinted eyes.
Style: A blue kimono and a painterly, artistic vibe full of flowers and colors.
My advice: To start, create your character on a simple background. This helps the AI focus on their face and silhouette rather than unnecessary details in the back.
🚀 Ready-to-use example (copy and test it!):
If you want to generate something in the style of my character, type into the bar:
Portrait of a japanese geisha, huge joyful smile, laughing, holding a bowl of popcorn, wearing a blue kimono, painterly art style, magical atmosphere
Step 3: Click your settings (It makes life easier!)
Instead of learning difficult commands, use the sliders icon to the right of the bar. This opens a magic panel where you can just click everything:
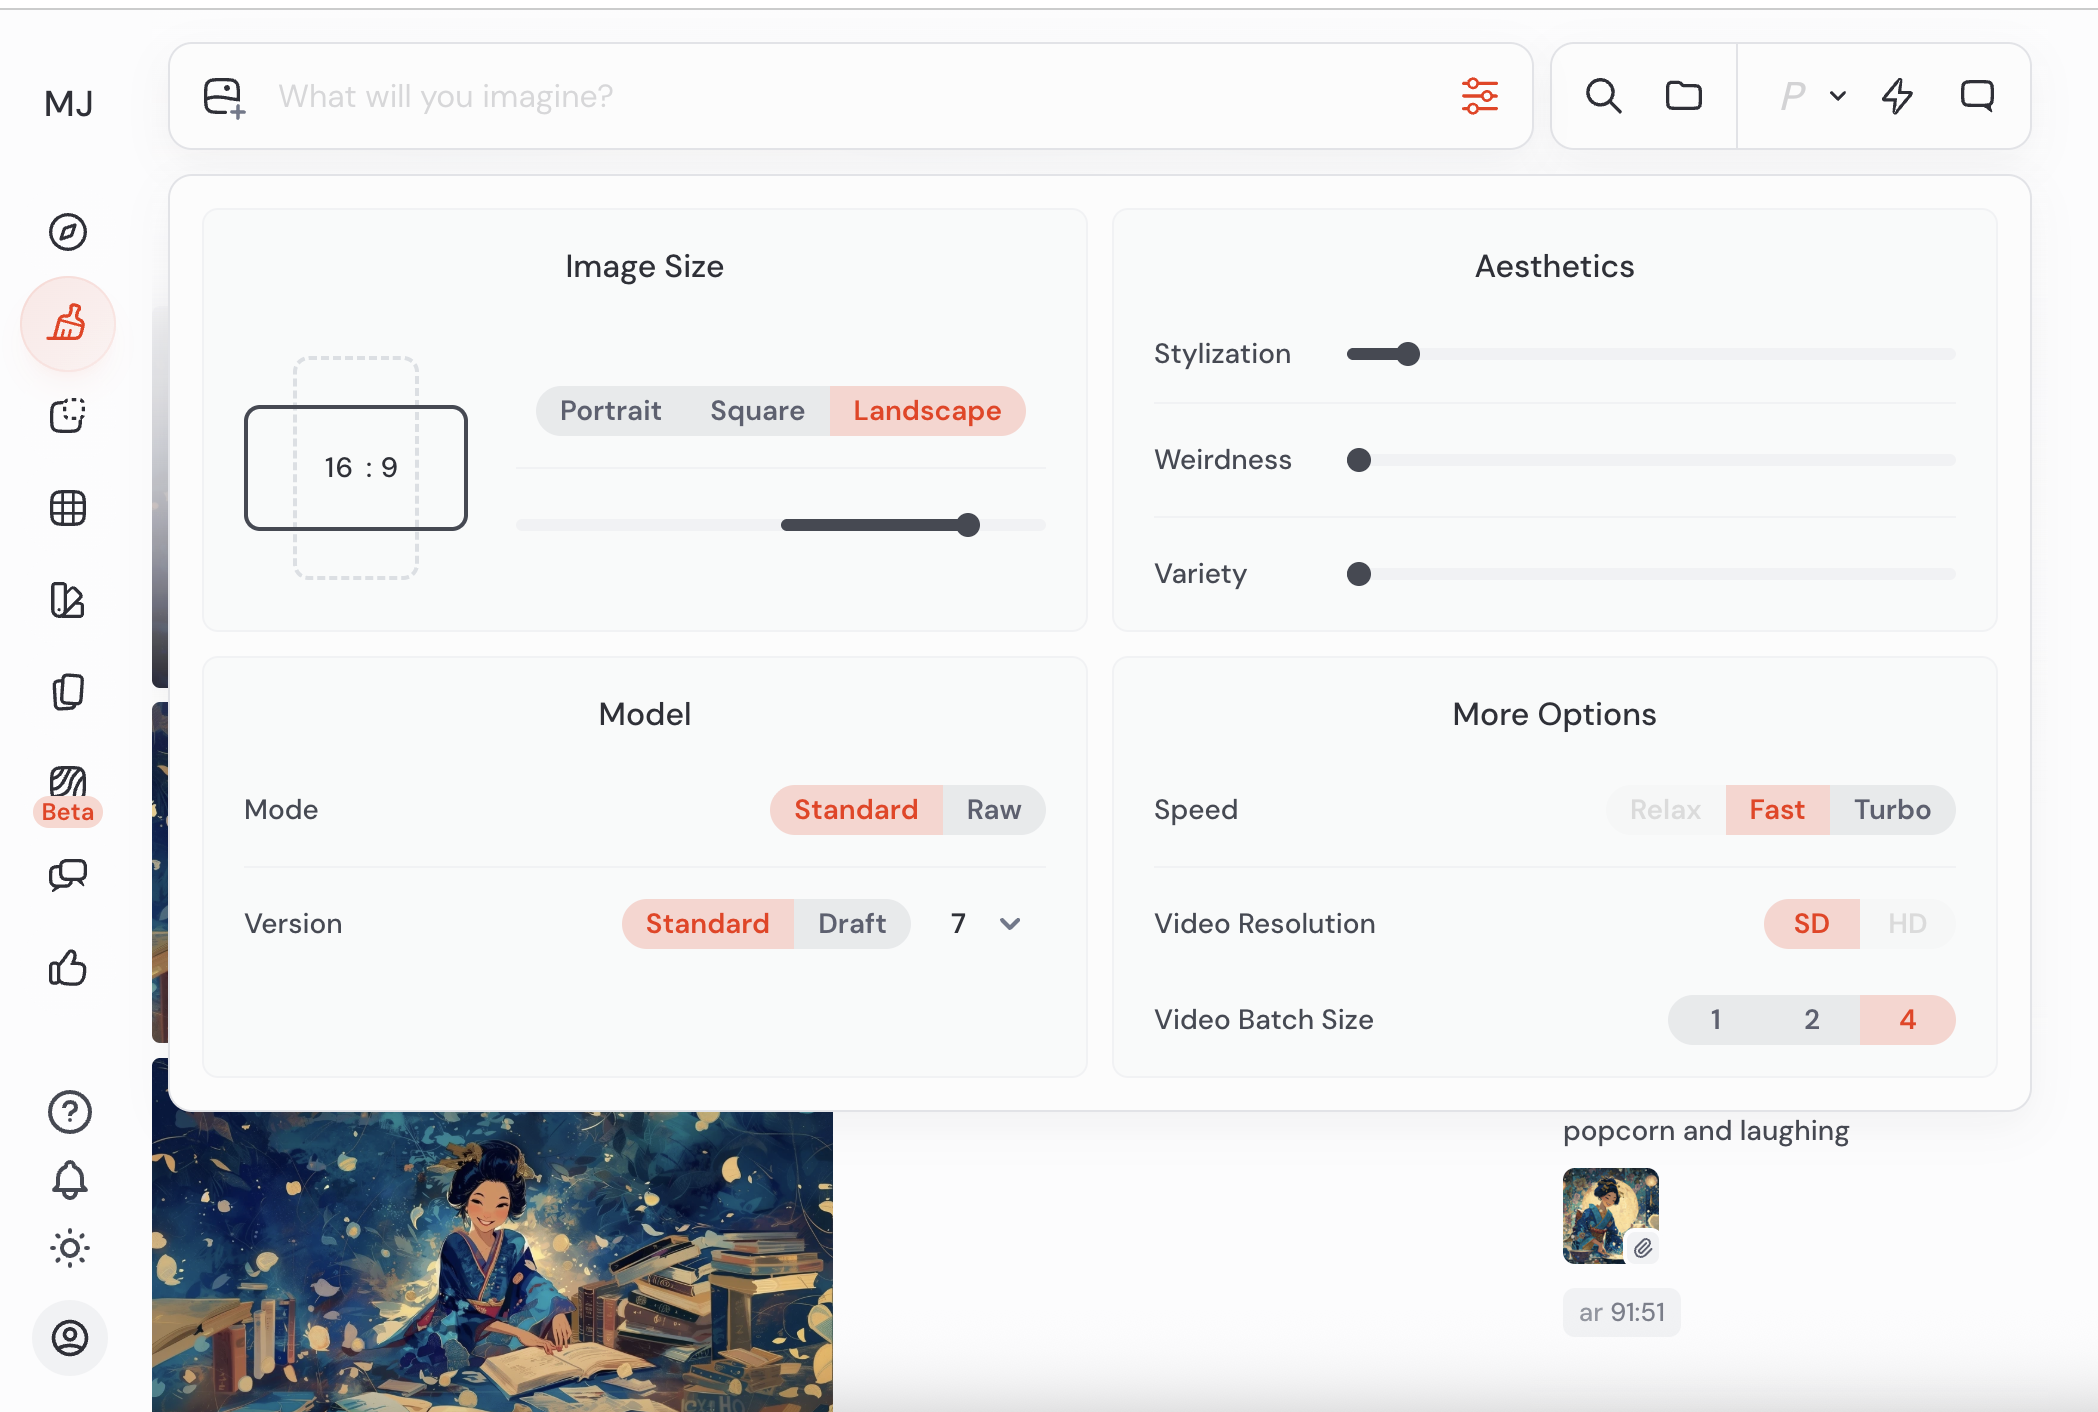
Image Size: No need to type numbers! Just click Portrait, Square, or Landscape. You can also move the slider underneath to set the format precisely, like a cinematic 16:9.
Model: Set it to Standard and version 7—it’s currently the smartest option.
Aesthetics (Stylization): The Stylization slider is like a seasoning—the further to the right, the more "artistic" the image becomes. The Weirdness slider adds some craziness, and Variety makes the 4 proposals you get more different from each other.
Step 4: Picking "The One"
After a moment, Midjourney will spit out 4 proposals. It’s like a mini-casting. When you find the perfect one, click it and select Upscale (S)—this option appears under your chosen image. This makes the image large, clear, and ready for action.
💡 Bonus: What else is here?
If you look at the More Options section, you’ll see a Speed button.
Fast: The standard, you get your image in about a minute.
Turbo: If you don't want to wait a single second longer. You can also enable the Video option to have the AI generate a short clip of how your image was created!
What’s next, ziomeczki?
You’ve just created your first character! Save it, because this is our template. In the next post, I’ll show you how to drop this image into the Omni Reference box (the little person icon at the top), so the AI uses that exact face and style in every new scene.
Let me know in the comments what characters you’ve come up with! 🏮🍿